Define effect and viewing
Choose flip, motion, zoom or depth; state viewing distance, movement direction, installation angle and light conditions.
Printed depth, flip and motion effects
Custom PET lenticular printing panels for flip, motion, depth and zoom effects, with project-specific lens pitch, interlaced artwork, registered printing, proofing and cutting.
Project specification
Production route
Choose flip, motion, zoom or depth; state viewing distance, movement direction, installation angle and light conditions.
Match PET lenticular sheet, LPI, thickness and lens direction to panel size and intended effect.
Build or supply artwork for the measured lens pitch, with image count, sequence, bleed and key subject position controlled.
Register the interlaced image to the flat reverse and evaluate the optical transition under representative viewing conditions.
Run the approved sheet, then trim or cut while preserving lens orientation and artwork-to-edge alignment.
Check effect, registration, size and surface, then label lens direction and protect panels from rubbing or distortion.
Project logic
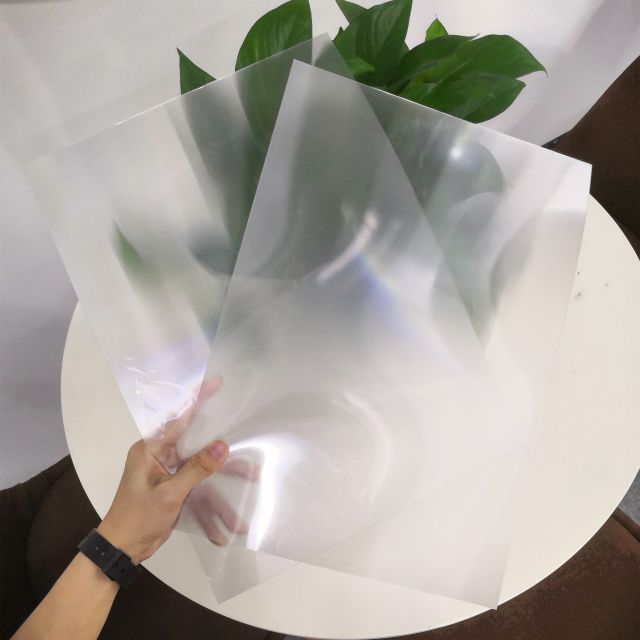
A lenticular panel pairs a ridged optical lens face with precisely interlaced artwork on the flat reverse. As the viewing angle changes, the lens directs different image slices to the viewer, producing a flip, motion, zoom or depth effect. This is an optical print process—not additive 3D printing. ONE PLASTIC supplies PET lenticular sheet and coordinates project-specific printing, registration, cutting and panel delivery around an approved physical proof.
A 3D lenticular image is a flat optical graphic. Parallel lenses on one face redirect interlaced image strips printed on the reverse, so different views appear as the observer moves. No object is built layer by layer, and the panel does not create a hologram. Define the desired visual behavior—such as two-image flip, short animation, zoom or simulated depth—before selecting sheet and artwork. Clear terminology helps ONE PLASTIC quote the optical panel instead of receiving files intended for a 3D-printer or an unrelated clear graphic sheet.
LPI describes the number of lenses per inch. ONE PLASTIC's published catalog includes multiple options such as 50, 60, 70, 75 and 100 LPI, but a higher number is not automatically better. Panel size, viewing distance, image count, effect, print resolution and manufacturing tolerance all matter. Coarser lenses may suit larger or longer-distance graphics, while finer pitches can support other close-view applications. The production choice should follow a physical test on the actual lens lot rather than a marketing comparison based on one number.
The ribs must run in the correct direction for the intended transition. A vertical lens orientation commonly supports left-to-right viewer movement, while other effects and installations may require a different relationship. Mark lens direction, top edge, viewing side and final installation angle on every drawing and proof. A panel rotated ninety degrees can lose the intended effect even when printing is accurate. If multiple pieces form one display, label orientation and sequence so installers do not mix otherwise similar panels.
Ordinary layered artwork is not ready to print. Source images must be aligned, sequenced and interlaced for the measured lens pitch and intended viewing geometry. Keep critical faces, text and logos away from unstable transition zones. Supply sufficient bleed for registered trimming and avoid very fine features that disappear when split across views. ONE PLASTIC can print buyer-supplied or mutually approved interlaced artwork; responsibility for creative sequencing, rights and final source assets should be stated rather than assumed.
The lens face is ridged, while the opposite face provides the printable plane. Interlaced bands must align closely with the optical pitch, and their relationship can be affected by material lot, temperature, scale and print setup. A white backing may be required to control opacity and contrast. Printing method—UV, screen or offset—depends on material, graphic, quantity and conversion plan. Use registration marks and production-intent material, then approve the viewed effect instead of evaluating the flat file alone.
A monitor cannot reproduce lens transitions. Review the proof at the expected viewing distance, height and direction with representative lighting. Check which image appears first, whether the transition is clean, whether unintended ghosting is acceptable and whether the key subject remains readable. Viewers at very different heights or angles may see different frames. Record lens lot or specification, print revision, orientation and approval conditions. Any later change to size, effect, artwork or lens pitch can require a new proof.
Cut paths, holes and mounting features must stay registered to the artwork and preserve lens direction. Sharp curves or small features may need review according to sheet construction and tool access. Identify which face remains visible and how the panel attaches without optical distortion. Lenses can show scratches and rubbing, so packing may use film where suitable, clean interleaving, sleeves, rigid support and orientation labels. Large panels should not bow in a way that changes the intended viewing geometry during storage or installation.
Send finished dimensions, quantity, installation drawing, viewing distance and movement direction, desired effect, number and order of images, preferred LPI if already tested, source and interlaced artwork status, print method or color reference, white backing, cut and hole details, proof requirement, mounting, packing and destination. State whether ONE PLASTIC receives final interlaced artwork or is asked to review a prepared production file. The quote should identify proofing because optical approval is central to the product.
Applications
Common questions
No. It is a flat optical graphic using a lens sheet and interlaced images to create angle-dependent flip, motion, zoom or depth effects.
LPI follows viewing distance, panel size, effect, image count and print capability. Compare options on a production-intent physical proof instead of choosing the highest number.
The artwork is registered on the flat reverse of the PET lenticular sheet and viewed through the ridged lens face.
No. Images must be prepared and interlaced for the measured lens pitch, orientation and intended viewing effect.
Custom trimming and shapes can be reviewed with the sheet, lens direction, artwork registration and mounting features.
The optical transition cannot be judged accurately on a flat monitor. A proof shows registration, sequence, ghosting and readability under representative viewing.
Multiple-view animation or depth constructions can be considered, but more views may affect image brightness, clarity and transition. The effect should be physically approved.
Send size, quantity, viewing plan, effect, image count, artwork status, lens preference, printing, conversion, proof, packing and destination.